
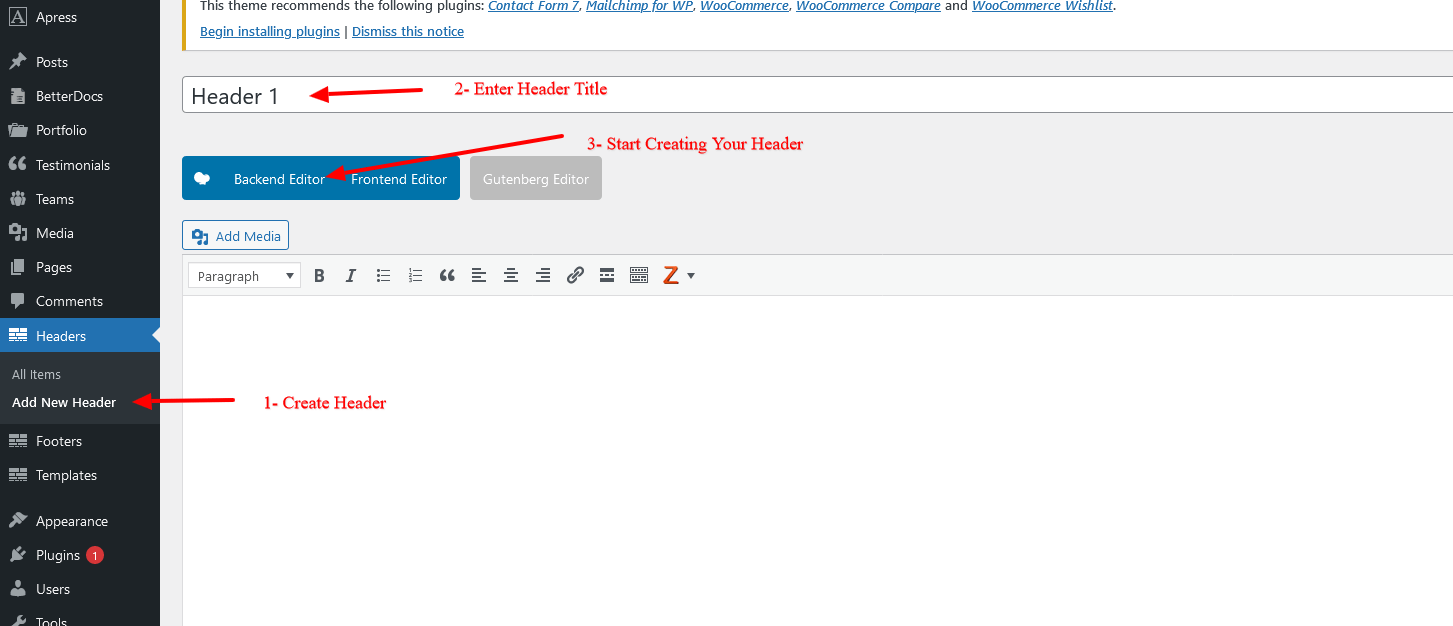
Create Header with WP Bakery Page Builder #
1- Add New Header
2- Add Title
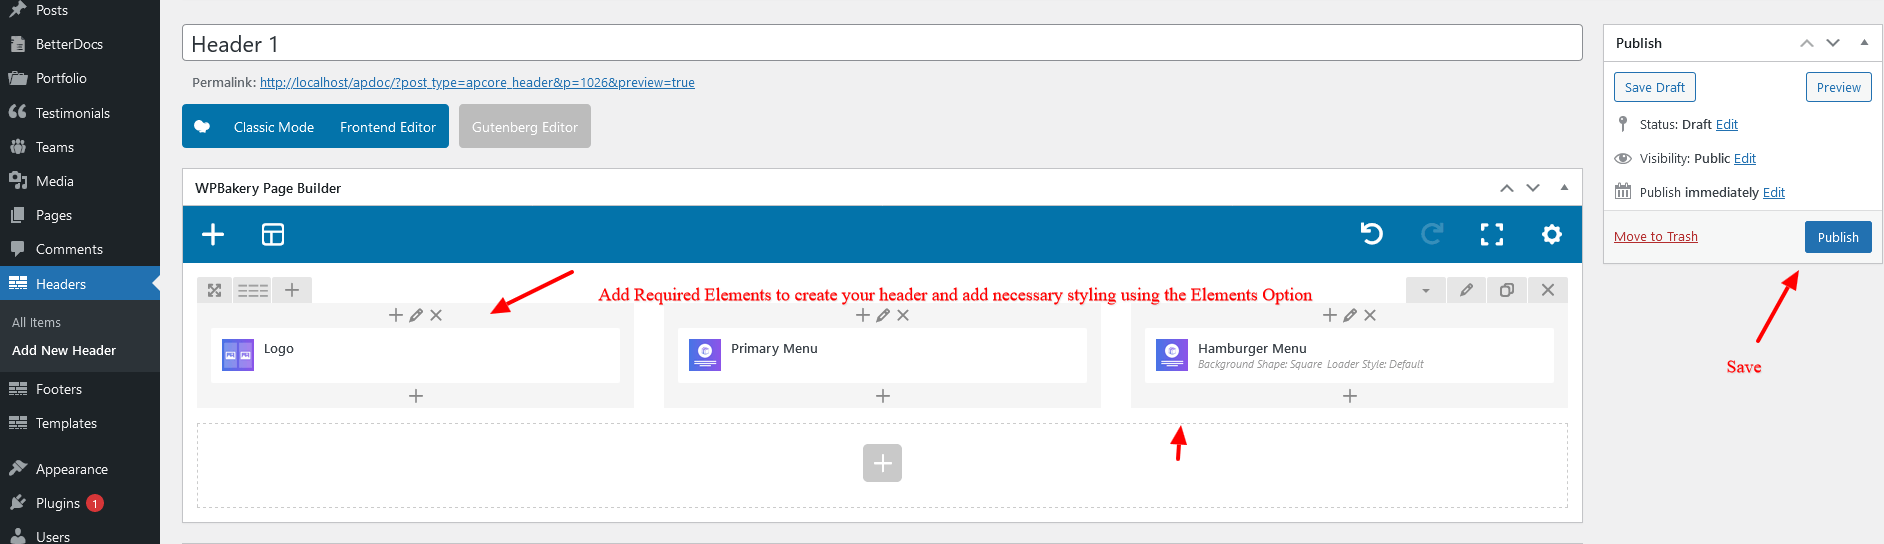
3- Create your Header with the elements
Adding Elements to your Header the same way using WP Bakery Page Builder
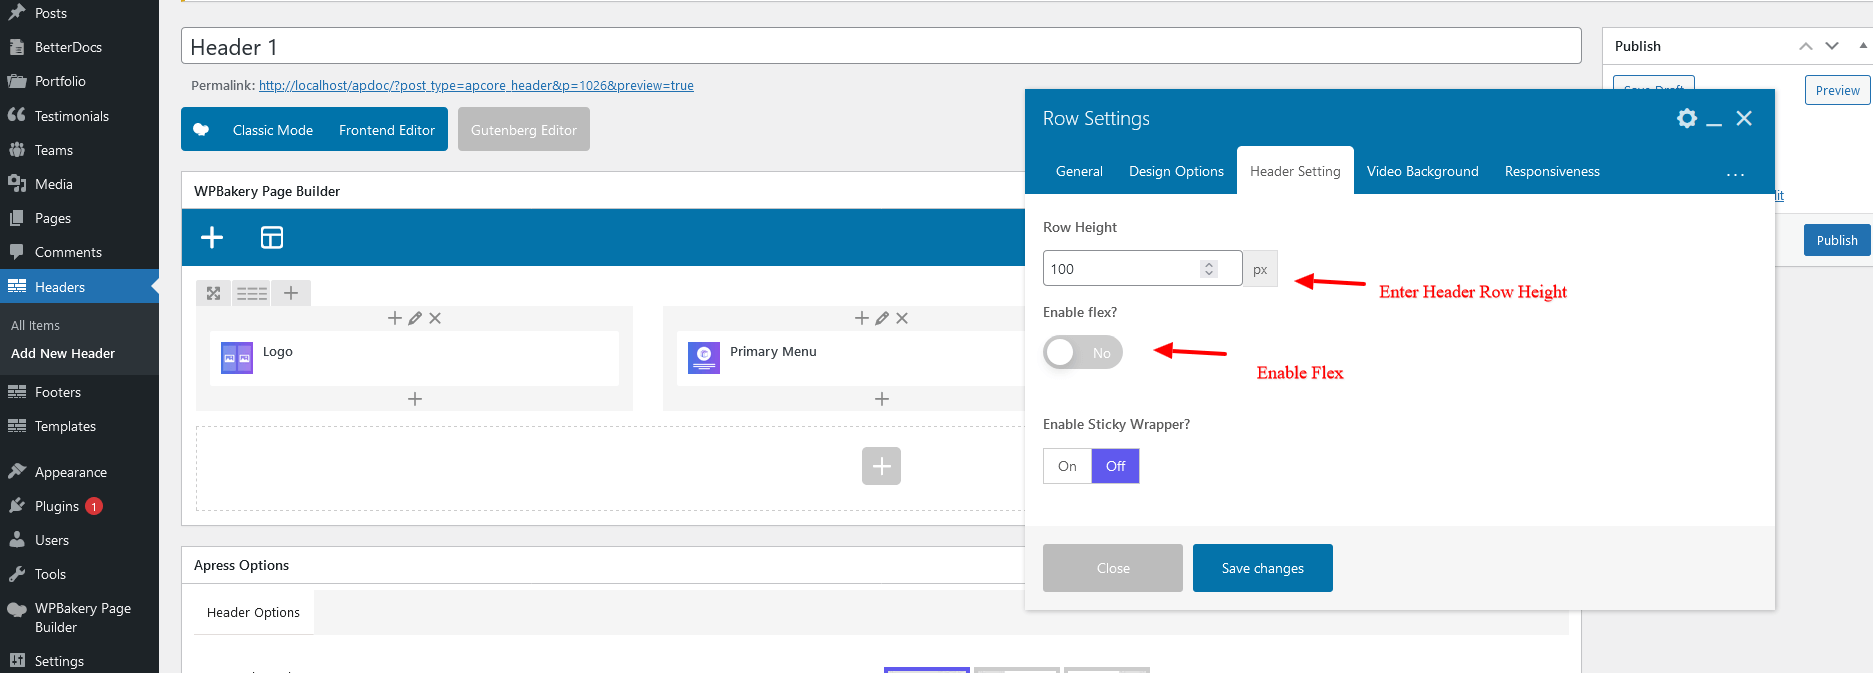
Header Settings #
Enable Flex –
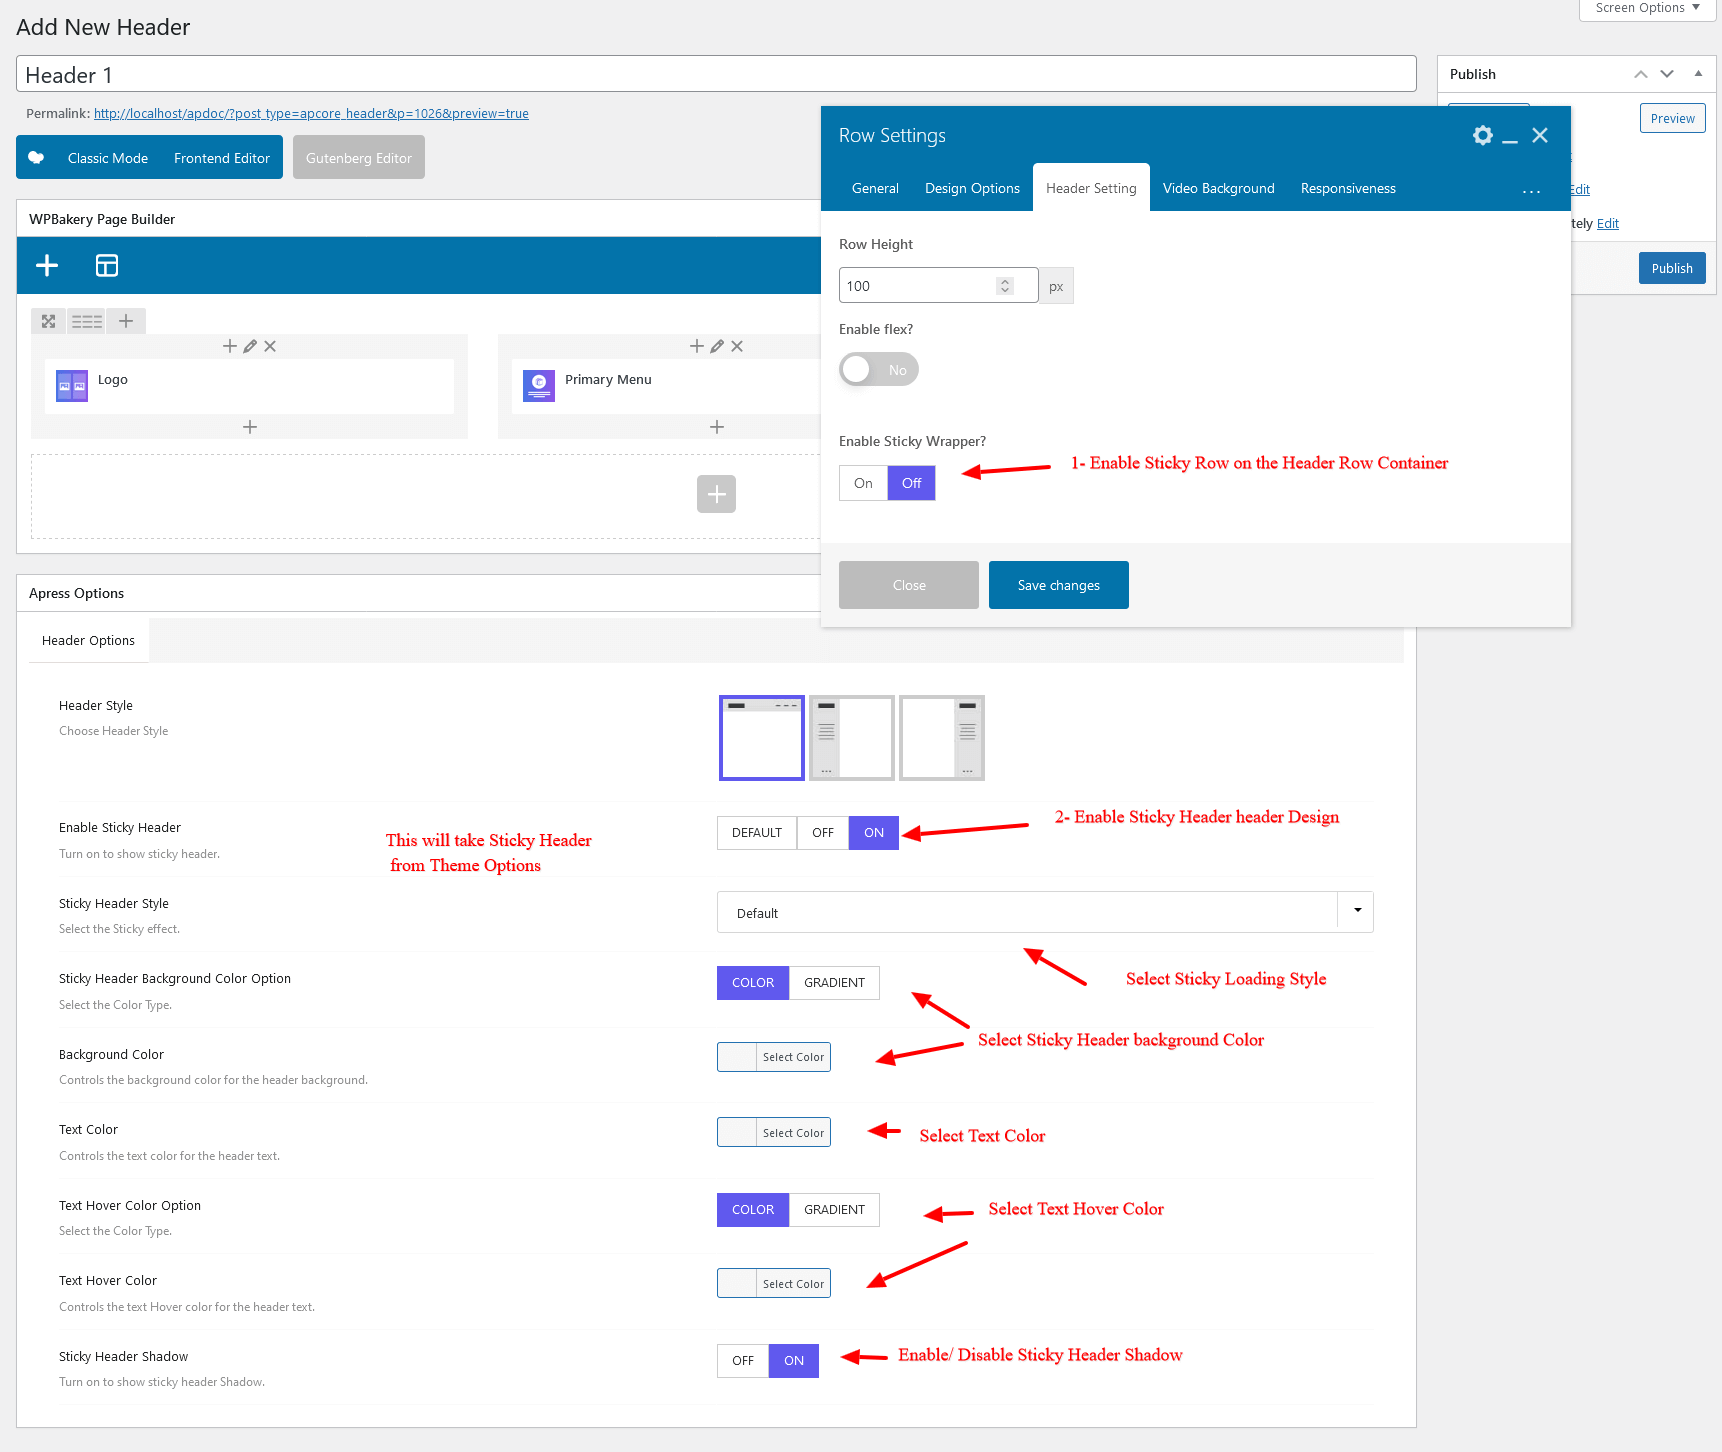
Sticky Header – #
1 – At the bottom of the Header Template you will find the settings for Sticky Header
2- Choose Styling
3- Select Sticky Header Background Color
4- Set Sticky Header Font Regular and Hover Color
5- Set Sticky Header Shadow Color
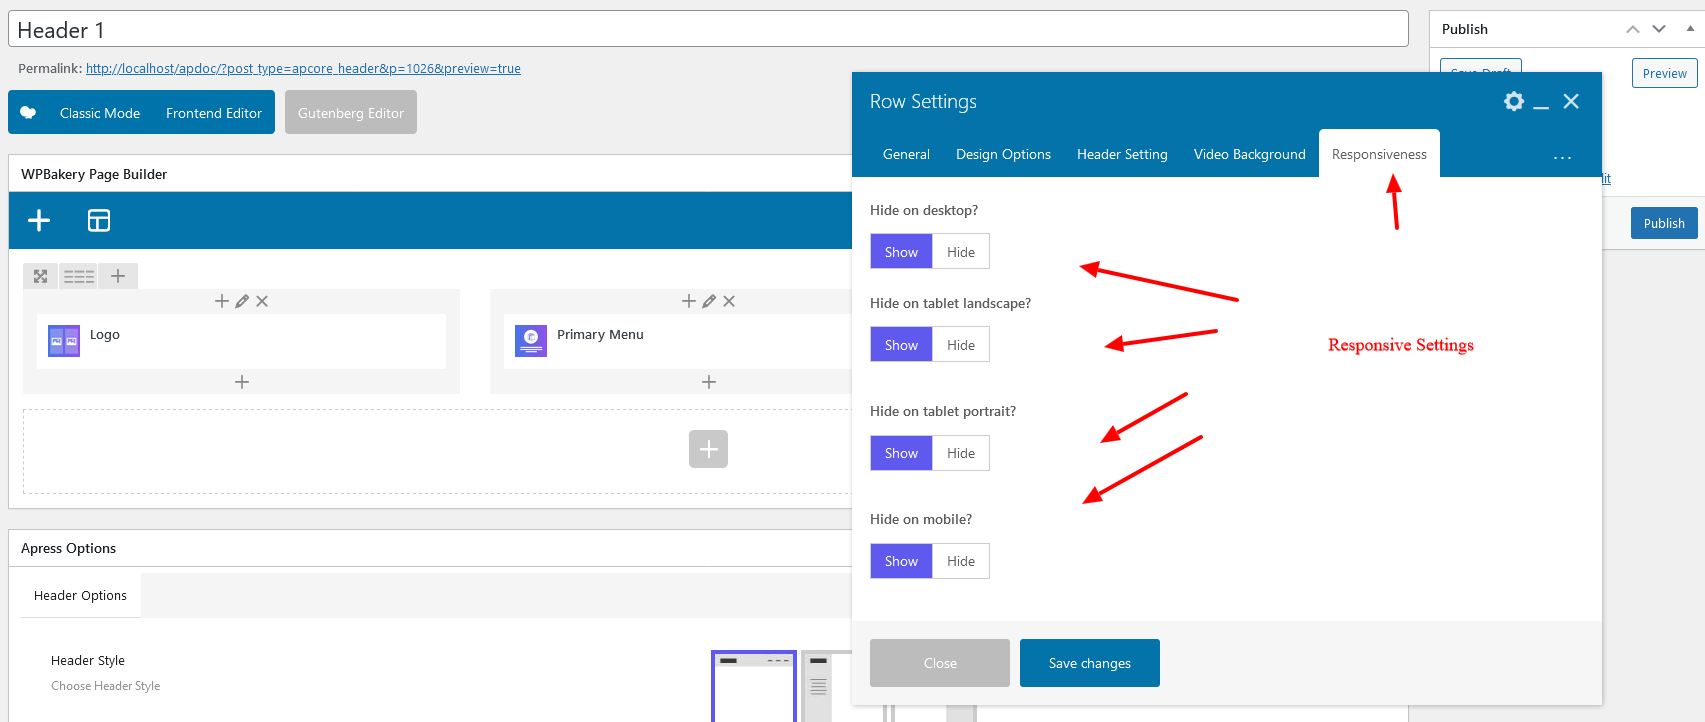
Responsive Settings #
Here you can easily enable / disable the visibility of the Header
1- Go to Header Row created using the Page builder
2- Open the Row Settings
3- Click on Responsive options
Here you can manage the appearance on the devices.
Check the link for Responsive Breakpoints – https://apressthemes.com/help/docs/responsive-breakpoints/
Selecting Header In Theme Option #
1- Go to Theme Options – Header
2- Here select Page Builder – A list of Headers available will display in dropdown
3- Select the Header created in Page Builder and Save.
Next Step – Customizing Mobile Menu for the newly created header – https://localhost/apdoc/docs/mobile-header-using-wp-bakery-page-builder/


